24.04.2014 г.

DIY spring home/room decor ideas,easy and cheap

Hello everyone,

i wanted to share with you few interesting spring decor ideas.
Ofcourse you can use them any season you want.
But now since the spring is here i came up with few ideas how to spice up your room or home and refresh it a little bit. You can find the video on my youtube channel.


I think that this decoration is so beautiful and perfect for the spring and summer.

Materials: 
Plate that you can find at home
3 small or medium candles
fake flowers
package of large sea salt

The instructiones how to make this will be in video soon.


Materials:
Fake flowers
3 small or medium candles
3 glasses that you can find at home


I think that this decorations will be perfect for table centerpices or anywhere around the house.


Materials:
A doily
3 small or medium candles
3 glasses


Flower canvas

Materials:
Cardboard
ruler and pen
fabric or paper
scissors
gluegun and gluesticks
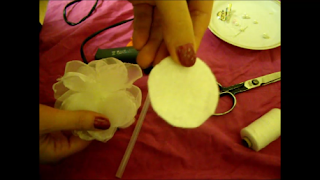
And here how is made.Enjoy

23.04.2014 г.

How to make ribbon roses , DIY,Tutorial

Hello everyone, 

i want to show you how to make really easy ribbon roses.
You can use fabric too if you prefer.
You can use them to decorate headbands,clothes or hairclips.
Possibilities are many.

Materials:                                           
ribbon or fabric
scissors
gluegun
piece of felt


4.02.2014 г.

Kanzashi flower tutorial, DIY


   Hello everyone, 

i am so glad that i can share with you another kanzashi flower tutorial.
I am going to show you how to make this flower in my video below.
It is perfect to decorate clothes or accessoires.
It is so simple and easy and i hope you will enjoy this tutorial.


Wish you all the best.

The crafty girl

23.01.2014 г.

How to make kanzashi flowers,diy,tutorial, fabric flowers


             Hello everyone,
i am so happy to share my new video with you.
I am going to show you how to make another way of making fabric flowers.
This is inspired kansashi flower.
This flower will be great accessoire for clothes and other things.

Thank you so much for watching.


Enjoy and i wish you all the best!

9.11.2013 г.

How to make kanzashi flowers, DIY, tutorial


Hello everyone,

i am so exited to be finely ready with my new tutorial.
I love to make kanzashi flowers, and i thought that i will be happy to share it with you.
They are so many different ways to make kanzashi flowers and today i am going to be showing you one of them.
So let's start.


Here are some pictures also for this tutorial:


Materials:
Satin ribbon or satin fabric
Beads for decoration
Lighter or candle
Needle and threat


To make the petals of the flower we need to cut the satin ribbon in squares
.
My ribbon is 6 cm, but you can use smaller or bigger is up to you.


I hope you found this tutorial helpful. Please fell free to leave comments and to check  out my You Tube channel where you can find  other tutorials also. http://www.youtube.com/channel/UCxMREf3W0WPp_4BCu-xAjKA

The crafty girl

15.10.2013 г.

DIY bib flower necklace

Hello everyone,

 it's a DIY TIME yeee :):)
I hope you have a wonderful day, or in case you don't maybe little bit of crafting will cheer you up.
This beautiful flower necklace is perfect for fall season and it is perfect accessoire for every day outfit or special occasion.

Soon i will post a video tutorial on my youtube channel so be sure to check it  out if you prefer video tutorial.
http://www.youtube.com/user/mycraftingspot01
So stop talking and let's move on to the tutorial.


Materials:
Few fabric rosettes, i have a tutorial on how to make this rosettes so fell free to check that out they are so easy to make. http://www.youtube.com/watch?v=suFJK3jOJL4&feature=c4-overview&list=UUxMREf3W0WPp_4BCu-xAjKA
Other option is to buy some from your local craft store.
Little piece of fabric or felt
Scissors
Ribbon
Gluegun
Some beads or embellishments
Multipurpouse glue


First we are going to take the peace of fabric or felt that we have and we will place the rosettes on the fabric and arrange them in a way we want, this can take a while.


So i did arranged the rosettes in shape that i like .


Now it is time to glue the rosettes on the fabric with the glue gun.


Now with the scissors i will cut the fabric around the flowers.


It should look something like this.


Now this is optional, you can decorate the necklace or leave it like that.
But i personally prefer to glam it up.
When i glue the beads i use multipurpose glue because when i glue beads with hot glue gun they fell off .


And this is how it looks decorated.


I already cut 2 peaces of ribbon with the length i wanted and now will glue the ribbon on the back of the necklace.


You can cut 2 little peace of the fabric and glue them to hide and secure the beginning of the ribbon as i show here, this is optional.


And now the necklace is ready.


I hope you enjoyed the tutorial and new tutorials are coming soon so make sure to check out my youtube channel as well: http://www.youtube.com/ user/mycraftingspot01.
Wish you smiley day and all the best.

The crafty girl


24.08.2013 г.

My new creations

Hello everybody,

I just wanted to share with you some of the things that i made lately.
They are not so much, but it's no problem. :):)

Resently i got so obssesed with kanzashi flowers. And i have been making them for few days now.
And i still have many ideas that i want to share with you.
And of cource new tutorials are coming soon.
So i will stop talking and move on with the pictures.
Please let me know what do you think in the comments section below.
Thank you!

Wish you a beautiful and smiley day. :):)


         I really love how these flowers turned out. Very delicate and perfect for wedding decorations.


                                     I love this kanzashi hairclip,and look so beautiful on the hair.
                   Soon i will make tutorial for this kanzashi flowers, so check out my youtube channel.


The crafty girl

18.08.2013 г.

Time to relax

Hello beautiful people, 

today i wanted to share with you something that it is not connect with diys or anything.
You know, so many of us, we have this days when we feel low and not in a mood.
That is so normal.
Often we are so caught up by the things around us and we feel so stressed and tired.

Studies shows that there are some things that can reduce our stress level and make us feel better when we are stressed, and the most helpful is music.
It's always worth it to just stop for few minutes and take your time, and listen to your favorite music.
I know life its very busy but we need time of our own. We worth it, We need it!

So i will stop talking and just share a melody i just found in youtube.
I like it so much and it makes me feel so relaxed.

So enjoy and wish you a beautiful day.


Yiruma - It's your day


and some others that you may like
http://www.youtube.com/watch?v=F-4wUfZD6oc
http://www.youtube.com/watch?v=anicaKGED00
http://www.youtube.com/watch?v=so6ExplQlaY

The crafty girl


13.04.2013 г.

DIY - How to make organza flower

Hi everyone,

 I am so so happy that the spring is here, trees are green , flowers are blooming and it's like everything it's coming to life. It's perfect time to change our wardrobe with spring clothes and to add colorfull  accessoires. Today  i went to the park and there were so many flowers and thought that the flowers will be the perfect accessoire for the spring and for the coming summer. 
So today i decide to share with you a tutorial on how to make organza flowers.This organza flower which i am going to show you it's the perfect accessoire for our spring outfits. :) Its so so easy to do and you can make it in you favorite color.
For this tutorial i am using white organza fabric because that's what i had in hand.

This tutorial it's with pictures but very soon i will upload a video tutorial on my youtube channel very soon.

Let's start:
Materials: 
Organza fabric
Candle 
Scissors
Gluegun
Little peace of felt
Beads
Clip
Needle and thread

Cut 5 big squares - around 3,5 inches 
And 4 little squares- around 2,8 inches


To make the petals of the flower we need to cut in the middle of each side of the square, but be careful to not cut the center of the square.


Now we will burn or melt the edjes of every petal to make it more flower like. Put the petal close to the flame but not to close because you don't want to burn yourself or the fabric. Be careful while making this project, just in case you can have a bowl full with water close to you.


When you burn all the petals your flower should look like this. Don't worry if it's not perfect, because when you start layering the flower will be not visible.


Now we have all the flowers melted. Then we have to start layering the flower.
You can make the flower with less than 9 layers, but i prefer nine because it looks more dimensional.


When we layer the flower, the petals from each layer should go betwen the ones from the previous layer, as  you can see on the picture.Continue till you finish the layers.When you layer the flower, start with the bigger flowers and finish with the smaller ones.


When you finish with the layering, sew all the layers together with needle and thread.


I added 3 pearls in the center of the flower, but you can use another beads if you prefer.You can glue them or sew them as well.


Attache the peace of felt to the back of the flower with glue.


And add a clip of your choice.


Our flower it's ready. Its pretty isn't it.


I think it's the perfect accessoire for everything. Posibilites are many.


I hope you enjoyed this tutorial and it was easy for you to follow. 
Please support me in my youtube channel and subscribe for more tutorials and other interesting things.
Take care and to the next time. :) :) :)

The crafty girl